
Spring is sprung in the UK and nothing signifies that more obviously than a rich carpet of bluebells under a vibrant canopy of lime green beech leaves. Walk into a forest early in the morning and the wonderful fragrant smell hits you, the scene simply begs to be photographed. So, how do you capture this beauty? Well here are a few tips to help you achieve some stunning bluebell shots. Read more of piece I wrote for the Fujifilm blog ......

Sleeklens Lightroom Presets
For many photographers presets are becoming an increasingly important part of their Lightroom and Photoshop workflow and the principle of producing a stunning image with just a few clicks is an enticing proposition. So is this possible, what’s available and how do they work?
Sleeklens are a relatively new Danish company who offer collections of individual workflows, either for Photoshop or Lightroom, to help you process your images and I was recently contacted by them to provide an impartial review of their product.
I took a look at their website, which was impressive being professional and clear, and also their Youtube video tutorials which were again very good. Consequently I agreed to test their "Through the Woods" workflow Lightroom presets as this is my preferred editing tool. They actually offer 3 full Collections and 17 distinct Lightroom workflow packages covering different genres such as Landscapes, Architecture, Portraits, Baby and Weddings and also offer a limited free tester range.
I do use presets already, mainly Google Nik Silver Effex and some Craft & Vision colour and b&w presets. However these are invariably used as a start point in the image process and in every case the “one click” preset is never the final image. I would like to admit that I always have a clear idea of my “end in mind” and select the preset to help achieve that look but the truth is that sometimes scrolling through the different options throws up a look that I hadn’t previously considered, though it is fair to say that in all cases care needs to be taken to avoid an overly processed look.
The “Through the Woods”workflow comes with 51 presets, along with 30 adjustment brush presets. The presets are organised into groups including “All in one” which are designed to be a one click solution though I must admit I didn’t think too much of these with the exception of “Pressed in Time”, a black and white preset that was a pretty good start point. However the rest of the presets are designed to be used together as layers to build up your image starting with Base then Exposure, Colour, Tone/Tint, Polish and Vignette. I found this way of editing to be much better and achieved some decent results though whether it saves time is debatable and it should be pointed out that all these effects can be produced by using the standard Lightroom sliders and controls.
In addition to the image presets which are applied globally to your image there are 30 Adjustment brushes for local editing and of course, like the global presets, the effects can be adjusted to suit your own taste. These not only work as a brush but also in the gradient and radial filters too. So you can see that the best way to use this workflow is to build from a base preset, then adjust the overall look before fine tuning with adjustment brushes.
Installation was pretty straightforward with some excellent support notes from Sleeklens.
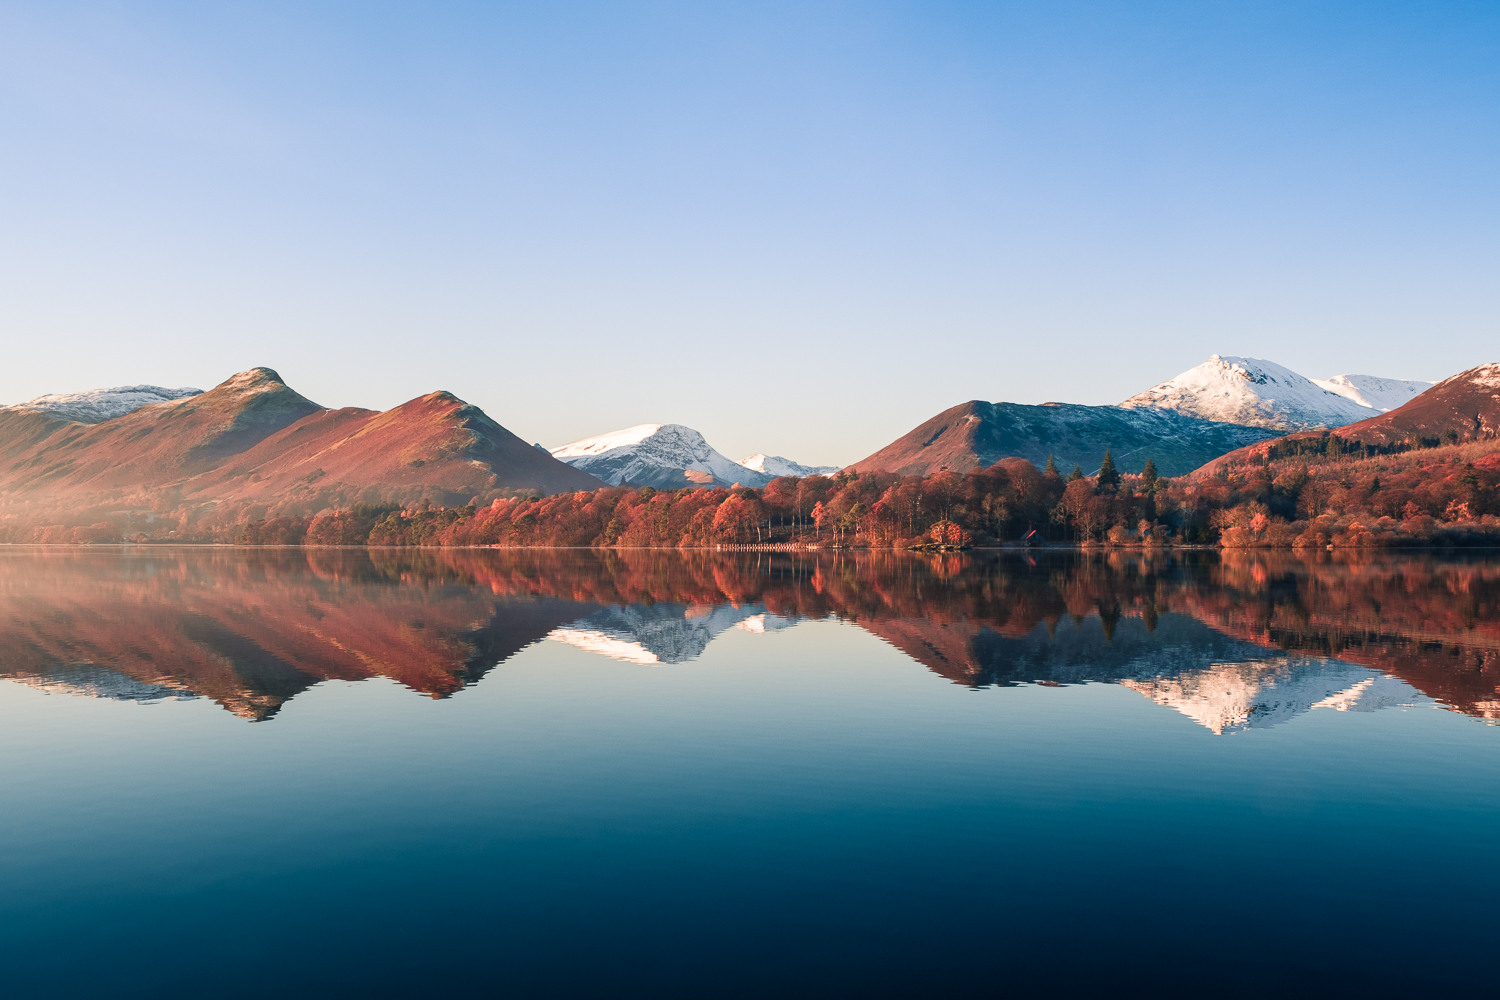
So how did the preset package perform? Well here are several examples.
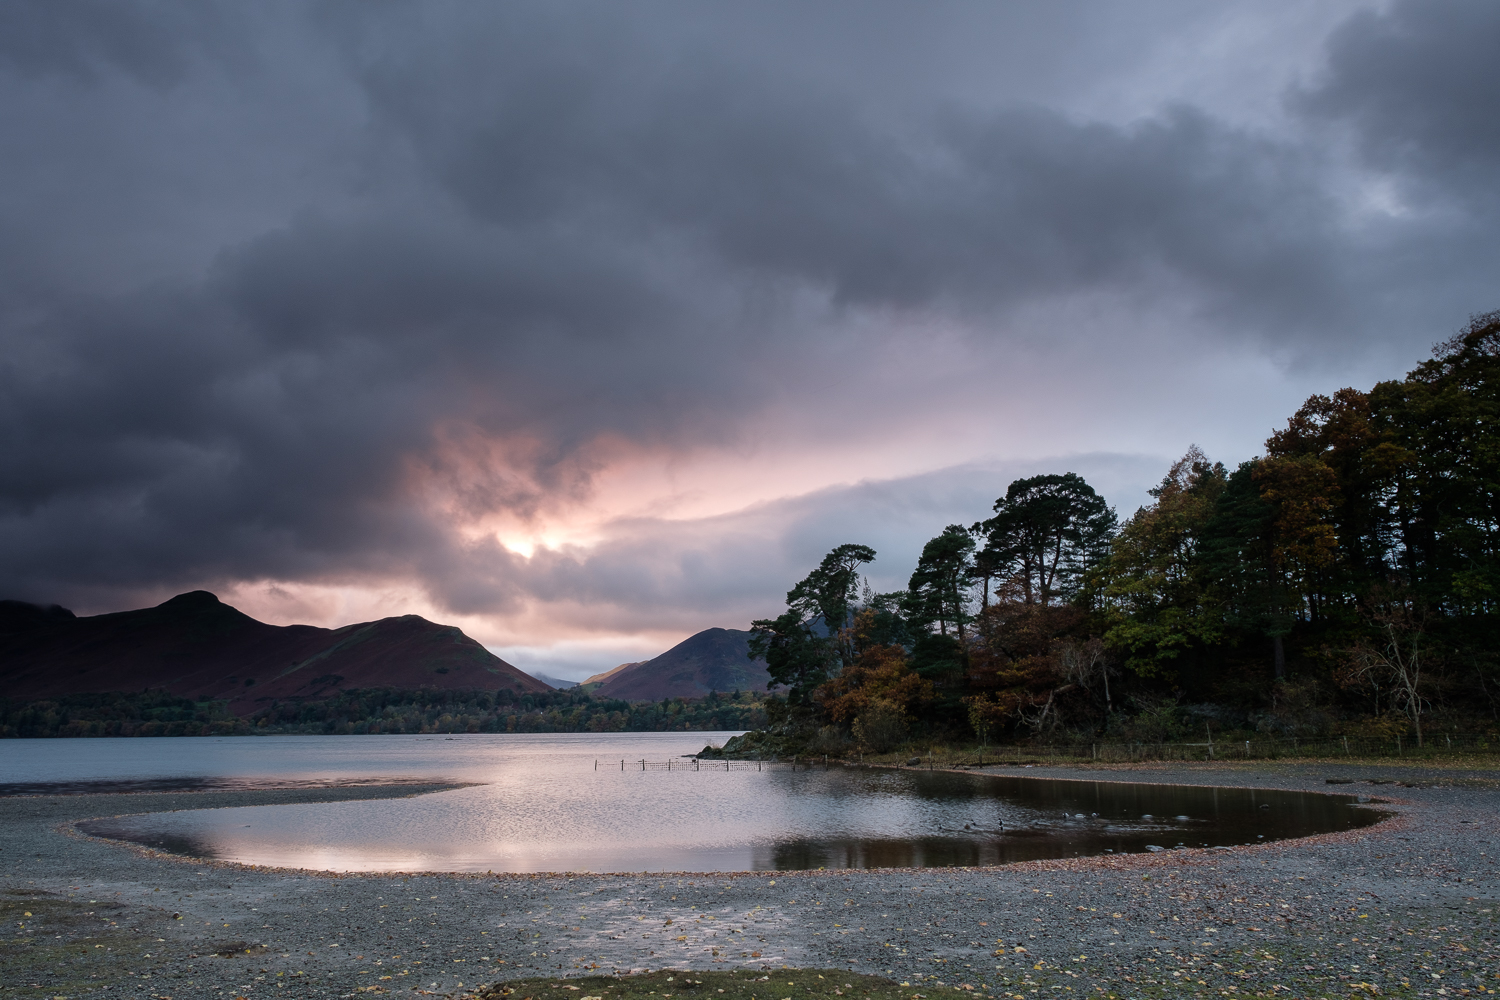
BEFORE ORIGINAL RAW
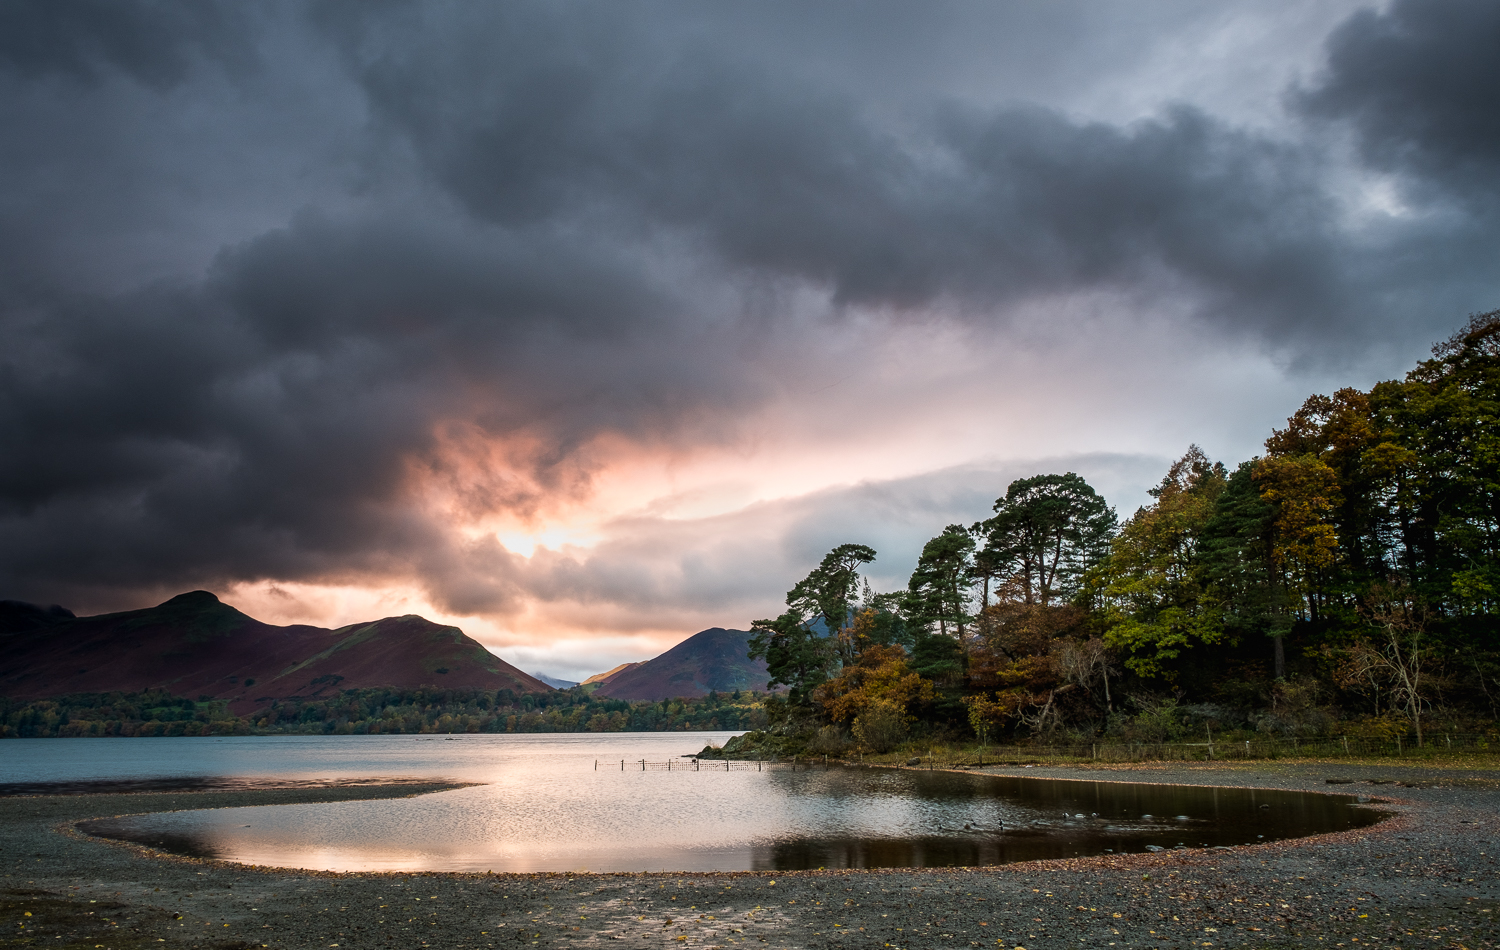
AFTER SLEEKLENS EDIT

BEFORE ORIGINAL RAW
AFTER SLEEKLENS EDIT

BEFORE ORIGINAL RAW

AFTER SLEEKLENS EDIT

BEFORE ORIGINAL RAW

AFTER SLEEKLENS EDIT

BEFORE ORIGINAL RAW

AFTER SLEEKLENS EDIT
In summary, after some initial reservations, I did find that these presets and brushes helped with both enhancing a pre-conceived image idea and with throwing up some interesting different effects that I hadn’t previously considered. What was clear was that the presets serve only as a start point and whilst all the effects are possible to create manually, all things considered, the time saving in using these presets and brushes is a benefit. I will definitely retain these as part of my image workflow.
The Sleeklens “Through the Woods” workflow is available for $39 from their website
For more information follow these links :
Disclosure : Sleeklens provided me with the "Through the Woods" workflow package of presets and brushes to enable me to undertake this review.
Tiffen Image Maker Interview
I was delighted to be asked by Tiffen, a leading manufacturer of imaging accessories for the consumer/professional imaging and the motion picture and broadcast television industries, to be the subject of one of their Image Maker interviews. Perhaps the most recognisable brand in their portfolio for stills photographers is the legendary range of Domke camera bags.
Over the past year I have started using these bags, indeed my full review of the F2 can be found here
The interview covers my background and start in photography, the development of my photography and passion for Travel, assignments and a recent major social documentary project. There are lots of hints and tips together with my choice of gear including Domke bags and Fujifilm cameras and lenses together with an explanation of my role as a Fujifilm X-Series photographer.
To read, click on the image below, I hope you enjoy it!

Cinque Terre Photography Tour
I am delighted to announce details of my photography tour to Cinque Terre, one of the most stunning locations in Europe.
With its dramatic coastline, multi-coloured villages, terraced fields rising from the azure sea and breath taking views, it’s no wonder why this is a UNESCO World Heritage Site.
Why not join me for a superb photography tour to one of the most photogenic regions of Italy.
For more details click here

Riomaggiore
Fujifilm X100F
Six years ago the Fuji X100 was launched into a world of DSLR’s, this “new kid on the block” was not only a bold, exciting innovation in its own right, it was the embryo to the incredibly successful range of Fuji X Series cameras that we see today.
Beautiful retro design, compact and delivering stunning image quality that had a wonderful filmic feel it’s no wonder that the X100 was so popular, attracting an army of devotees. Here was a camera company that had listened to the needs of photographers and delivered exactly what they were asking for, a successful strategy that Fujifilm has continued.
Roll on six years and Fujifilm has now launched it’s fourth generation model, the X100F.
Retaining the same gorgeous design principles It’s a fusion of retro, classic good looks incorporating modern hi tech, intuitive to handle and produces that legendary image quality.
User Review
This review is not intended to be a full technical overview of every feature, there are plenty of other sites that will give you this, but more of my impressions after using this camera for a few weeks.
Now I should point out here that I use a Fuji XT2 and XPro2 as my main cameras and that I’m a committed zoomer! As a travel and landscape photographer I prefer the flexibility of zoom lenses in most situations. So when Fuji asked me to be part of the test team for a fixed lens camera I was intrigued to see how I would find the experience.
The first thing that struck me was simplicity. A small lightweight camera that, reassuringly, had many of my favourite features from my other X Series cameras. Now moving from a DSLR to a Fuji system I was well accustomed to the benefits of a smaller, lighter more portable system but this camera took things to another level. I could go out with this in my pocket and a spare battery or two and just enjoy my photography.
I believe that successful photography is about eliminating the variables and the most important question when we are photographing a subject is which
lens do I use. With only three lenses in my bag I typically have a choice from 10mm – 300mm, a daunting prospect and one which can be confusing and result in missing pictures simply because of the options available. On the flipside working with a prime lens or in this case a fixed lens forces you to work with what you’ve got to create compelling compositions. It’s really a question of a mindset change, to think what shots is this lens great for rather than which shots can’t I get. When you make that change it really opens up the creative options and helps you develop as a photographer.
The 23mm focal length (35mm full frame equivalent), gives a similar field of view to our own eyes, so it’s a great general purpose lens, not too wide and not too long. If you want a closer or wider view then you need to use your feet! During my test I used this camera mainly for shooting landscapes so tended to use apertures of f5.6 – f11 and the lens produced crisp, sharp images with good colour rendition. The addition of image stabilisation in the next model would be a welcome feature.
Favourite Features
The X100F incorporates the heritage of the X100 series and the best of the latest Fujifilm cameras.
The layout is clean and simple layout is so easy and intuitive to use with the main controls of aperture, exposure compensation and a new combined shutter speed / ISO dial all easily accessible and controllable. To change the ISO you pull up the shutter speed dial and turn. I did find this a little fiddly and it was impossible to do this whilst wearing gloves.
The X100F features the latest APSC CMOS X-Trans III 24mp sensor the same as in the XT2/XP2 and delivers excellent image quality.
The Hybrid VF offers optical or a bright Electronic Viewfinder with 100% coverage and like other Fujifilm cameras the “what you see is what you get” functionality is awesome. Personally I prefer the electronic viewfinder though for street and social documentary photography the optical viewfinder with manual focusing screen is great and saves some battery power too.
I would have loved to have seen the camera incorporate a flip out LCD screen as this is a feature I use a lot to capture creative compositions and I’m sure it would have been welcomed by street photographers too.
I was delighted to see the inclusion of the AF joystick, inherited from the XP2 and XT2, as it makes shooting so much faster. I’m sure those upgrading from the earlier X100 models will love this feature too.
The Auto ISO options, with 3 presets, is perfect for shooting a variety of situations. I have mine set for landscape, street and interiors.
For pure ease of use one of my favourite features is the Custom Exposure Compensation. Enabled via “C” on the compensation dial it provides +/- 5 stops of exposure compensation which can be simply dialed in using the front wheel, perfect for fine tuning your exposure quickly and easily.
I often use Manual focus when shooting landscapes and find the MF Assist Option of Focus Peaking with Red Highlights invaluable in confirming that critical front to back sharpness.
Another feature that can be very useful In high contrast situations is the ability to use the Extended Dynamic Range function to avoid overexposing the highlights.
For more creative shots the built in 3 stop Neutral Density filter is really useful for allowing wide apertures and minimum depth of field in bright conditions or for slowing the shutter to introduce creative motion effects to your shots, perfect for moving clouds or water.
The ability to immediately transfer images to your phone or tablet, process and upload to social media is sure to be one of the most popular features on the camera.
One point to mention on batteries, the X100F now uses the NPW126S batteries which is a bonus if you own an XE, P or T camera though not if you expected to be able to use your old X100 batteries.
If Fuji want to earn more brownie points then the inclusion of a lens hood would be seen as a positive with the next incarnation, especially as the official Fuji version is pretty expensive.
In Summary
The X100 series has a legion of supporters and is a firm favourite for street photographers where the discreet form factor allows you to blend in to the scene avoiding interest when capturing your images. However it also earns its place in the bag of travel and landscape photographers, especially those for whom weight is a critical factor.
The best camera is the one you have with you and if you want a classic to pop in your pocket and take anywhere, that’s a joy to use and be confident that it will deliver excellent results, then this is the camera for you.
Here is my video from a great couple of days in the Peak District.
Here is my video from a great couple of days in the Peak District.
Read More